Voice-Over Voice Actor

A Peek Into The Secret World Of The Voice Actor

Interested in pursuing a career in VO? Curious what goes on behind the scenes in a business where people talk funny for money? This book offers a fun and comprehensive look at what it takes, what goes on and what it’s like behind the mic from two working pros who started from scratch.

Filtering by Tag: mic technique

Reminder: Work on your mic technique!

We are regularly asked about how to use a mic correctly, so here are our guidelines, again. Keep working on it, and soon it will be comfortable and second nature.


man an d mike cartooon

Tips for Microphone Technique

The mic can be rather daunting when you first start out in voice-over! Practicing at home with one will help to reduce the newness of it, and the distraction from it.

Here are some tips to get you started.


PROXIMITY

Find your own comfort zone, with regard to proximity. Many voice-over artists will angle slight to the right or left of the mic, for two reasons:

1) This can reduce or eliminate pops from plosive sounds like t, b, or p. When you're in a session, engineers can help by putting a “pop shield,” a stocking device or foam shield, in front of the mic. But if you angle- speak slightly across the mic - you create a similar effect to a pop screen.

2) You will be able to see and read your copy off to the right or left, without the mic being right in front of it.


VOLUME

Well, the mic is there to amplify the sound, so you can be as soft or loud as the job requires, but you need to work with the mic to create this. If you are recording yourself, make sure you are getting a solid wave form, and if you are working with an engineer s/he will do this by first getting a good level of your planned volume before recording the take. You can’t speak softly while the engineer gets a good level, and then shout during your take!

Every different session will call for something different in the way of volume . For example, if you want low, deep sounds from your voice it can help to get very close to the to the mic, perhaps two to three inches. If you know you are going to really project, and speak louder, stand back, seven to nine inches from the mic, so your voice doesn’t distort.

Then trust the mic and your own voice and skill. If you need drama and a “dark” interpretation, you might try a whisper, or near-whisper. And if it is comedy, use a little more level and smile the whole time you are speaking. It is amazing that a smile can come right through the microphone to the listener!


LIGHTING

You must be able to see well, to read your copy! Make sure you are well prepared with contacts or reading glasses if you need them, and some artists even carry a small clip-on light, which runs on a battery, to attach to the stand holding your copy. Lighting must be ample to reduce the possibility of unnecessary errors when you read. In many studios you can ask to increase the level of light if it isn't bright enough for you.


TECHNIQUE AND SKILL

Do your breathing exercises. Practice reading all kinds of different material at home in front of the mic. Try things and experiment at home to learn what your real strengths are. And stretch yourself to try new things. Try different pitches, different volumes, mimic cartoon characters or famous actors or comics. Read out loud in front of the mic and record it if you can, to listen back - you will learn so much from hearing your own work.

The more you develop and then employ your microphone technique and skill, the less the engineer and producer have to rely on enhancements in the studio. The less they work, the faster and easier the session, and the more likely you are to be re-hired! Plus, comfort and skill with the microphone shows your professionalism, getting the job done well and quickly, which is the producer’s goal!


Voice Over in the Studio: The Proper Distance from the Mic


Microphone technique

VO actors: The Proper Distance from the Mic


distnce mic
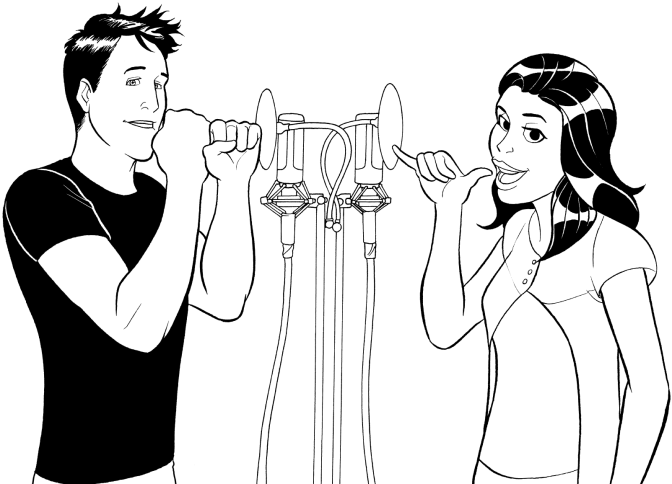
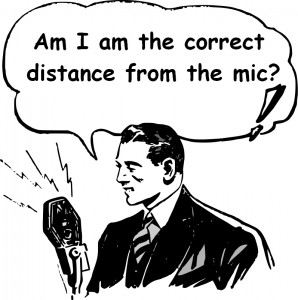
The microphone is very sensitive, so where should you stand in relation to it? The engineer might ask you to get a little closer or stand a little farther back, but here's a good place to start: open up your hand, palm up. Now, close just your three middle fingers (the index, middle finger, and ring finger). You're left with only your pinky finger and thumb extended, much like the popular surfing Hang ten sign or, if you hold your hand up to your ear, the international Call me! sign. The distance from the tip of your pinky to the tip of your thumb is about the distance your mouth should be from the mic. You can also put two fists on top of each other to measure roughly the same distance.

An exception to this mic distance rule is when you're working with a loop group doing ADR and walla. In that case, you'll be working in a larger room, moving around a lot with a group of people, and your distance from the mic will be much farther.

Now, obviously, these rules may change depending on the type of sound you're trying to create. For example, if you're going for a whispered, or soft, sultry quality, you may wish to get a little closer in on the mic. For yelling and screaming you will probably want to back off so as not to blow out the engineer and whoever else may be in the studio.

When you speak, the sound comes out in a cone shape; so while a mic will generally pick you up no matter where you are in the booth, you'll always get your best sound if you're standing directly in front of it. And once you're in position, pay attention to where you are and how that feels. It'll be important for you to maintain a pretty consistent position throughout your session so that the recording quality matches from line to line and session to session.

How much freedom do you have to move around? The answer is … some. You shouldn’t be worried about keeping your head stock-still. You have some play: about 15-20° to the right and to the left. The same goes for up and down. There’s a stand in the booth to hold your script, so feel free to tilt your face down to read from it. The mic can take it, and so can the engineer.

You definitely don’t have to memorize each line and then look up to deliver it, although some people might do this, particularly if they’re looking up to sync with mouth movements on a screen. The trick is to do the looking with just your eyes, and not change the relationship of your mouth to the mic in the middle of a take. Moving your head will make a difference to how the recording sounds. So, before you say the line, decide how you want to place your face in relation to the mic.

Movement only begins to cause problems in two cases:

1. when the movement itself gets noisy, either due to your clothing/shoes or your flailing about and knocking into things

2. when your movement carries you too far from the mic or too close to the mic

Either of these cases can cause you to have to do another take of the line because there are limits to what even the engineer can compensate for.


 +++++++++++++++++++++++++++++++++++++++++++++++++++++++++++++++++++

Check out our VoiceOverVoiceActor website for more tips and exercises. We post daily VO tips on Facebook and Twitter, and our book, Voice Over Voice Actor: What it’s like behind the mic  includes a wealth of exercises to build your voice and keep it ready for a successful voice over career!


Microphone Technique

The mic can be rather daunting when you first start out in voice-over! Practicing at home with one will help to reduce the newness of it, and the distraction from it. Here are some tips to get you started!

Read More